
Hey guys, this is the walkthrough page I mentioned in my post, Spoilers... and Requests? I might have to put one page for each region... not enough room. :D So, to get you started, let's begin at the starting point for all basic trainers: KANTO. (By the way, I'll leave in unrelated comments of my own in and they will be in bold, just so you know. They're basically what I thought when I was playing the game.) (Oh yeah, I also wrote most of this mahself so back off, plagiarizers!) (The other part came from Pokedream.com.) (NOTE: This walkthrough only goes up to the Elite 4.)
Kanto walkthrough (FireRed/ LeafGreen):
So, first talk with Professor Oak, tell him everything he needs to know (name, gender [seriously, he can't tell if you're a male or a female -.-], rival's name [POOPY], etc...). (Even if he acts like a creepy pedophile!) Next, go to YOUR PC (THIS IS IMPORTANT) and take out a Potion. (Stand in front of it, then press A.) Then, go downstairs, talk to your mom, and go outside. Go north into the grass area. Prof. Oak (read:Pedophile!!!!!) will come to tell you that it's dangerous to go on without a Pokemon. He'll take you to his lab, where your rival (known as Gary from now on) is waiting. He asks you to choose a Pokemon. Go to the table with the three PokeBalls and choose the Pokemon of your choice. (The best choice is Bulbasaur, cause it's strong against Brock's pokemon while you haven't caught anything better. You can capture a water type pokemon LATER.) Gary will come over and choose the Pokemon that has a type advantage over yours. (This is what I really hated in the games... I was never able to beat Gary's Venusaur. Yes, I chose Squirtle. Problem?) For example, if you pick Squirtle, then he'll pick Bulbasaur. (MY POOR SQUIRTLE!!!!! BEAT UP BY GARY'S HEARTLESS BULBASAUR!!!!! WAAAAAAAAAAAAHHHHHHHH...) As you leave the lab, Gary will challenge you to a battle. If you win, your starter will automatically get elevated to level 6, and you will get MONEY!!!!! (MONEY MONEY MONEY!!!!! *Forgets completely about Squirtle*) Ok, then go out of your only home, (sniff... sniff...) and onto Route 1. Catch more Pokemon and level up your starter! Talk to the first person you see for a free potion. (You know, it's kinda weird... you go up to all these strangers and talk to them. Ever heard of stranger danger?????) Once you get to Viridian, go NorthWest to a narrow hallway. You will find a PokeBall on the ground. (Dun da da! Wild PokeBall appeared!) Investigate, (again, go in front of it and press A) and you will get a Potion. (By the way, I really love those PokeBalls. Haha, that just sounds wrong. PokeBalls? I have a perverted mind. >_<) Then, go to the PokeMart (Prof. Oak will tell you where that is and what that is) and talk to the dude at the counter. He will tell you that there's a package for the old dude, (AKA Prof. Oak) and he needs you to do it. (DOING STRANGERS FAVORS????? I THOUGHT I TAUGHT YOU BETTER THAN THAT!!!!!) There is nothing to do now in Viridian, so head back to Pallet. (You can jump over the ledges to avoid tall grass) Once you're back in Pallet, give the old dude his package. Gary will come back! (Whoa, he hasn't left yet? Wow.) The old dude will give you stuff which I am not allowed to disclose the identity of. XD Anyway, leave Old Dude's house and go to the house right next to yours and talk to the girl inside. She is Gary's older sister (GASP! HE HAS ONE?) Daisy, and if you talk to her, she will give you a Town Map. Embark on your journey TO VIRIDIAN CITY!!!!! Wait, I've already been there. Oops. Go WEST once in Viridian and go to Route 22. You can battle Gary again! (Yay. Note sarcasm. Here comes Gary and his powerhouse Bulbasaur, oh no I can't beat them! Help meeeeeee!!!!!!!!!!!!!!!!!) He now has 2 Pokemon, so be careful and train before you do battle him. The Pokemon are a bit stronger then before, but no worries, you will be, too! After you battle him, go to heal your Pokemon and buy stuff. Don't try to challenge the gym. (I did once, and it was the biggest waste of time I have ever encountered in my entire life of playing Pokemon.) Go to Route 2 and another old dude will show you how to catch a Pokemon. (Of course you could catch one before he teaches you how to, but still.) Then he will give you a Teachy TV which you can use if you have questions about stuff in the game. (TEACHY TV????? AHAHAHAHAHAHAHAHA!) You will not be able to access the full Route 2 because it is blocked. Plain and simple. After you get through Route 2, you will come to the Viridian Forest, and you will have to make your way through it without mah help. After you get through it, you arrive in Pewter City. Prepare for your gym battle with Brock, and when you're ready, go to... drumroll... THE PEWTER CITY GYM!!!!! Dun dah dah... So, battle Brock and his minions and kick their butts! You will acquire THE BOULDER BADGE!!!!! And a few other items, but they're not important. Before you leave Pewter, a colleague of Old Dude #1 (Oak) will run up to you and give you RUNNING SHOES!!!!! YAY!!!!! Now you can travel faster by pushing B. Too bad you have to push it all the time. Leave Pewter and go to Route 3. There will be a lot of trainers there waiting to crush you 'cause they think they're all high and mighty, but if you're strong by now, you can crush them instead. Fight every trainer you see 'cause you'll get stronger, and then you can kick more butts. At the end of Route 3, go into the Pokemon center and heal up. There will be a guy who offers to sell a Magikarp for "ONLY" $500, but DO NOT BUY THAT. It was the biggest mistake I had ever made. I would suggest fishing for one instead 'cause they're so easy to catch and stuff. Go out of the Pokemon Center, and you'll be at the FOOT of MT. MOON. Mt. Moon is a maze with a few trainers and some good items. None of the starters have a good advantage in here, as the Pokemon here are of many different types.If you are lucky, you'll find a rare Clefairy. (I WAS SO LUCKY AND FOUND ONE!!!!! You wouldn't BELIEVE how happy I was.) When you've finally reached the end of Mt. Moon, you'll see two shell-shaped fossils. One is the Dome Fossil (which can be turned into a Kabuto), and the other one is the Helix Fossil (which can be turned into an Omanyte). A trainer owns both of them, and he will fight you. Beat him, and he'll share a fossil with you. You can only take one of them, not both. After taking your fossil, it's time to leave Mt. Moon. (WAAAAAAA!!!!! It was fun beating up Team Rocket jerks and getting cool items!) Go onto Route 4 and make it through to Cerulean City, home of the second Gym. Heal your Pokemon and stock up on items. You won't be battling in the Gym first. Gary is waiting patiently for you. (Oohhh! I get to battle Gary again! Yay! Note sarcasm AGAIN. It really annoys me how much I have to battle him.) Go north from Cerulean City towards Nugget Bridge, on Route 24. Gary will come and greet you, and will challenge you to a battle. He has the following Pokemon: lv. 17 Pidgeotto, lv. 15 Rattata, lv. 15 Abra, and lv. 18 of his starter Pokemon. This should be a much more challenging match than the last one. A Pikachu (can be caught in Viridian Forest) would help out a lot if you chose Charmander as your starter. This is because both Pidgeotto and Squirtle, the toughest Pokemon on Gary's team, are weak to Pikachu's attacks. After one real tough battle, Gary will give you a Key Item known as the Fame Checker. This is used to identify trainers whom you've previously battled. Go back to town now and heal your Pokemon, and continue traveling on the Nugget Bridge. There are six trainers on Nugget Bridge that you must fight to get past. The sixth trainer is actually a member a Team Rocket. Beat him, and he'll give you a Nugget that you can sell for $5,000. (OOOHHHH!!!!! MONEY MONEY MONEY!!!!!) After that, go on to Route 25. There are tons of trainers waiting to battle you on Route 25. But that isn't the main reason you've come upon this route. You want to meet a scientist named Bill. Go all the way to the end of Route 25, and you'll arrive at a house called Sea Cottage. Go inside, and you'll see a Clefairy. It turns out that something went wrong with Bill's experiment, and the Clefairyis actually him. Talk to him, and he'll go inside his machine. Press "A" against his computer, and he'll be transported to the other end of the machine. Finally, he'll come out as Bill, a human scientist. Talk to him again, and he'll give you a S.S. Ticket for the S.S. Anne in Vermillion City. Now that that's taken care of, it's time to go back to Cerulean City and challenge the gym leader!Cerulean City is the city of water. Naturally, Water Pokemon are what the trainers in the Gym use. There are two trainers you must battle before battling the gym leader, Misty.
Misty uses a lv. 18 Staryu and a lv. 21 Starmie on you. A Charmeleon under lv. 25 without any assistance would most certainly lose now. Of course, it's a totally different story with a Ivysaur. (TOLDJA SO!!!!! :P) Now you can leave Cerulean City by going to the house with a policeman outside in the north-eastern section of the city. The house is a mess inside, because a Team Rocket member in the backyard has dug into their house. Fight that Rocket! Tee hee! Now that you're on the other side, go south, and you'll find a house. That's the Day Care Center. The old man inside will raise your Pokemon's level ($100 for each level) if you leave it with him. The only bad thing is that your Pokemon might learn some unwanted moves, and delete moves that you want. The good thing is, if you were to leave a weak Magikarp with him, and walk for a while, it'll be able to evolve in no time into a powerful Gyarados! I highly suggest that you catch a Meowth on Route 5. Meowth is a special Pokemon in that once in a while an item mysteriously attaches to it. Many times the item is a Berry, but the items are not just limited to Berries. The entrance to Saffron City is closed, so you'll have to detour through the Underground Path to the next route. Before entering the Underground Path, talk to the little girl if you want to trade your male Nidoran for her female Nidoran. You'll walk a long walk in the dark Underground Path. Soon, however, you'll see the daylight of Route 6. Route 6 has six trainers waiting to fight but you can get by with fighting only two of them if you want. There's a lot of grass but no new Pokemon. Head to Vermilion City since once again the entrance to Saffron City is closed. Go all the way south, and you will arrive at Vermilion City.The house at the north-western corner has a Fisherman who'll give you an Old Rod, which allows you to catch Magikarp. Go south a bit, and you'll find two houses to the left. One of the houses is where you can trade aSpearow for a Farfetch'd. The other house is the Pokemon Fan Club. Talk to the chairman inside to get a Bike Voucher.
In the Pokemon Center, talk to the girl standing in front of the counter for a VS Seeker. This device allows you to rechallenge trainers who have trained their Pokemon to be even stronger than the first time you battled them. To activate the VS Seeker, simply stand around a couple of trainers and select the item. Trainers who are hopping around are the ones who will battle you again.
Now go back to Cerulean City, get yourself a bike from the Bike Shop, and come back in style! (I love mah bikes...) The S.S. Anne may seem small, but it's huge inside. It can be found by going south of Vermillion City, and "flashing" your S.S. Ticket to the guard. If you explore each and every room inside, you'll find tons of trainers and quite a few items. A girl in the second room from the right on the main deck can heal your injured Pokemon. In the ship's kitchen, you'll be able to find your first Berries, three of them to be exact, in the trash cans. From now on, all Berries will be stored in your new Berry Pouch. To end your stay at the S.S. Anne, fight Gary on the second floor.
After beating him, go up to the captain's cabin. He's seasick and puking. Rub his back and he'll give you something. Not giving it away. Now leave the ship. When you're outside, the ship will sail away. Remember: if you don't get Cut, the ship won't leave. If you want the S.S. Anne to stay, lose to a trainer after getting Cut. Now teach Cut to one of your Pokemon, and you're ready to go to the gym. (Might not make sense with all that cut stuff, but you can infer pretty well that you get the move CUT by rubbing the captain's back.) Cut the tree blocking the path to the gym and go inside, where you'll face a few trainers who use Electric Pokemon. Now comes the hard part: Lt. Surge, the gym leader, has put electric locks on the door that leads to him, so you'll have to solve a puzzle. There are a bunch of trash cans. Press "A" on every one of them until it says that you've found and flipped a switch. You need to flip two switches for the door to open, so you'll need to find the second switch. The second switch is always either is always either above, beside, or below the first one. If you get it wrong, the switch will be reset, and you'll have to do everything over again. This is a very tricky and sometimes annoying puzzle, (SOMETIMES ANNOYING???? I NEARLY THREW MAH DS ACROSS THE ROOM THE FIRST TIME I PLAYED IT!!!!!) but hopefully, you'll get it sooner or later. And when you do open the doors, it's time to fight Lt. Surge.
Lt. Surge has the following Pokemon: a lv. 21 Voltorb, a lv. 18 Pikachu, and a lv. 24 Raichu. Beating him with a Ground-type Pokemon is as easy as tossing a PokeBall, and catching one is easy too. You can catch a Diglett or even a Dugtrio in the nearby Diglett's Cave. If you beat him, he'll give you TM34 - Shock Wave and a Thunder Badge. If you go east from Vermilion City, you'll find Diglett's Cave on Route 11. This cave is no maze. It's simple to go through since there's only one road. There are no items to pick up. The only Pokemon you'll find are Diglett and the occasional Dugtrio. Head inside and go to the other end to go back to Route 2 for some important business. After you exit the cave, you'll revisit Route 2. But this time, it's the other half of the route that you weren't able to explore before. Go south, and you'll find a house. Inside, a guy is willing to trade his Mr. Mime for your Abra.
The next house has one of Prof. Oak's aides in it. If you've collected ten or more Pokemon he will give you HM02 - Flash. It's used to illuminate dark caves and tunnels. Keep on going for two items.
Go back through the cave and go east when you get out. You'll be on Route 11. There are many trainers, many items, and a whole lot of grass. When you reach the gate, one of Prof. Oak's aides will be upstairs. If you have caught up to thirty Pokemon, he'll give you an Item Finder. This item helps you detect hidden items that cannot be seen. There's also another trainer that'll trade you a Nidorina for a Nidorino. You can't go to the other side since there's a Snorlax blocking the way. Now go back to Cerulean City and cut the tree that was blocking the way. Then you'll get onto Route 9. On Route 9 you'll be battling many trainers. Here, you'll find TM40 - Aerial Ace. To reach the end of this route, just keep on going east, where you'll arrive at Route 10. Route 10 is short for now. You'll see some water. When your Pokemon learns Surf, it can surf to the Power Plant, just south of Route 10. Make sure that you have taught one of your Pokemon the Flash HM in order to enter Rock Tunnel.
There's a Pokemon Center for you to heal your Pokemon here. One of Prof. Oak's aides is here. If you've caught at least twenty Pokemon, he'll give you the Everstone. Let your Pokemon hold the Everstone, and they won't evolve. (Now why would you want to do that?) Rock Tunnel requires that your Pokemon know Flash, otherwise, you'll only be able to see a tiny bit. Like Mt. Moon, Rock Tunnel is a maze. There are items, trainers, and new Pokemon here. Here, you'll meet a Pokemon every eight to ten steps, which is more than normal. Use Repel if you don't want to meet too many wild Pokemon. After you exit the tunnel, you'll fight a few trainers, and will then be heading to Lavender Town. Lavender Town has no gym, so you won't be able to do much here. Later though, you can catch Ghost Pokemon in the Pokemon Tower when you get a Silph Scope. Without it, your mission in the tower won't be complete, and all the Ghost Pokemon won't be identified. For now, you can battle Gary in the tower on the second floor. Gary's team now greatly varies depending on who you chose for your starter at the beginning of the game. Once you get the Silph Scope, you'll find Mr. Fuji at the top of the foggy tower, and he'll give you a PokeFlute that's used for waking up Snorlax and other Pokemon. Now, visit the Name Rater if you want to, who'll be able to change the name of your Pokemon. Then shop for new items in the PokeMart. Finally, go west to Route 8. Route 8 has trainers and new Pokemon. On Route 8, you'll have your first two-on-two battle with the Twins. Saffron City still can't be accessed, so go inside the Underground Path. There's not much to do in Route 7. The guards are still thirsty, so go on to Celadon City. Celadon City is the largest city in this game. Its PokeMart has six stories; no wonder it needs an elevator! They sell all sorts of things. You'll be able to buy TMs and normal items (such as Potion and Antidotes) on the second floor. On the third floor, you'll see many people playing Game Boy Advances. Talk to the person at the register, a Move Tutor, and he'll teach one of your Pokemon the move Counter. The fourth floor has many evolution stones you can buy to evolve certain of Pokemon (ex. Eevee) for $2100 each. On the fifth floor, you'll be able to buy items such as X Attack and Calcium. These are items that modify a Pokemon's stats so they can do better in battle. Finally, you'll reach the rooftop, where you'll find three vending machines and two people, including a little girl. Get a Fresh Water, a Soda Pop, and a Lemonade from the vending machine, and give it to the little girl one at a time. She'll give you TM16 - Light Screen, TM20 - Safeguard, and TM33 - Reflect, respectively, for your drinks. There is huge building to the right of the department store that's nearly empty inside. Talk to the old lady who's surrounded by Pokemon on the first floor. She'll give you Tea, which you can give to any one of the Saffron City guards so they can let you through. You'll also find the game's programmers in this building, one of which will tell you to return after getting all the Pokemon. He'll give you a diploma for catching all the Pokemon. Now leave the mansion, and go in through the back door. Go all the way to the rooftop, where you'll find a small building. Inside you'll find a person and a PokeBall on the table. Pick it up; it's an Eevee! Now go to the Game Corner, a place full of slot machines and people on them. Team Rocket made it, and you win or buy coins in order to trade it in for Pokemon and TMs in the building to the right of the Game Corner. A few people will give you free coins, and there are invisible coins scattered on the ground that you can pick up. At the top of the Game Corner, battle the Rocket member, and push the button on the poster. A staircase leading to the basement appears.(There won't be any comments for a while...) After that, you'll be going through four floors, battling Rocket members and collecting valuble items. There is a spin maze on the second basement floor (B2F). The arrows in the maze will toss you in whichever direction the arrow points. Here, you'll pick up a few items including a Moon Stone and TM12 - Taunt. On B3F, you'll find TM21 - Frustration and Blackglasses, which boosts the power of Dark Pokemon. There is another spin maze on this floor where you can pick up a Rare Candy. Head to B4F, where you'll find TM49 - Snatch. Battle the single Rocket member at the top, and he'll drop the Lift Key for the elevator. Take the elevator on B2F to B1F. Battle the Rocket member, and take the elevator again to B4F. Go all the way to the left, and pick up the Calcium. Head up to the two Rocket guards and talk to them. They'll fight you, and after you're through with them, they'll open the gates. Walk through the entrance, and you'll face Giovanni, the head of Team Rocket, in an intense match. He has a lv. 25 Onix, a lv. 24 Rhyhorn, and a lv. 29 Kangaskhan. A Grass or Water-type Pokemon would work out fine fighting this guy. However, beware of his Kangaskhan, as it can be very powerful. After beating Giovanni, he'll disappear, and leave behind a Silph Scope. This is used to detect Ghost Pokemon. After beating Giovanni in the Game Corner, head to the gym by cutting the tree. Here you will battle Erika and other trainers (many of which you can avoid, who all use Grass-type Pokemon. Erika is the trainer in the middle between the two trainers inside the enclosed area. She has a lv. 29 Victreebel, a lv. 24 Tangela, and a lv. 29 Vileplume. If you choose a Fire Pokemon as a starter, then beating her would be very easy. Even if you didn't choose a Fire-type starter, a Psycic or Ground Pokemon would come in handy, since Victreebel and Vileplume are weak against those types. Beating her earns you TM19 - Giga Drain and the Rainbow Badge! Next, head to Lavender Town's Pokemon Tower with your Silph Scope. Once you get to Lavender Town, go into the Pokemon Tower. Head up the stairs, picking up items and battling scary looking women. Right before you reach the stairs that leads to the top floor, you will be stopped by the ghost of a dead Marowak. It was a mother of a Cubone, and was killed by the evil Team Rocket. Defeat her to calm her spirits (you cannot catch her). At the top floor, you'll be fighting three Rocket members. They will leave one by one after you defeat them. At the end, you'll find an old man, known as Mr. Fuji. Talk to him, and he'll transport you to his house, where he'll give you a PokeFlute. (Argh, did I say that before? I can't remember.) Now go back to Celadon City, and head west to Route 16. Cut the tree and battle the two couples in a two-on-two match. Head through the building to get to the other side and then go into the small house. Inside, a little girl will give you HM02 - Fly. Go back and cut the tree again to get back to the other side. A fat roadblock, a lv. 30 Snorlax, is blocking the road to Saffron City. Save your game, press "A", and the PokeFlute will begin to play. Snorlax soon wakes up, probably angry at what you just did. Try to catch this Snorlax, which can be quite difficult. Even if you accidently made him faint and you didn't save the game, there's one more Snorlax in the game.
After either capturing or defeating the Snorlax, go through the Guard House for an Amulet Coin from one of Prof. Oak's aides if you've captured at least fourty Pokemon. After that, go to any Guard House that leads to Saffron City. The guard will drink your Tea, and then will let you through. The first thing you'll notice when you get to Saffron City is that it's a pretty big city. The next thing you'll notice is that everywhere you go, you'll find Team Rocket members. The first problem to take care of in this city is Team Rocket. To get Team Rocket out of the city, go to the Silph Co., the large window filled building with a member of Team Rocket next to it. Now you must go through eleven floors, fighting Team Rocket, and in the end, saving the company's president.
The first floor is empty. Go up a floor by taking the stairs at the top-right corner. Remember, your goal is to reach the top floor and save the president. However, you cannot go directly to the top floor. Also, keep in mind that you will be finding warp squares on the ground. Stepping on them will take you to different places in the building. If you want to go through all this faster, then take the elevator to the 5th floor. However, I suggest that you go up the floors one by one, as you may miss out on valuable items.
Once on the 5th floor (if you chose to go there right away), go left and down all the way until you see a warp square. Step on it, and it'll take you to the 9th floor. Step back on it, and you'll return to where you were. Proceed by going to the right, where you'll find an Itemball containing the Card Key, which is used to open any locked door in the Silph. Co. Now that you've gotten this important item, you can explore the Silph Co. by battling Team Rocket and picking up a couple of items, including TMs. There's even a Move Tutor who'll teach your Pokemon Thunder Wave on the 2nd floor. Open all the locked doors just for fun, and because you simply can, and try every warp square. If you ever need to heal your Pokemon, you can do so on the 8th floor by sleeping on the bed.
When you're done exploring, head to the 3rd floor, and open the door on the left with your Card Key. Take the warp square in the first room, and you'll be teleported to a room on the 7th floor. Here, Gary will challenge you to a battle. As usual, Gary's team has gotten stronger, and hopefully, your Pokemon can take care of him. After defeating him, talk to the Silph Co. employee in the same room and he'll give you the Pokemon Lapras. Use the other warp square to get the the 11th floor. Go into the enclosed area, and Giovanni will challenge you to a match.
 Giovanni has the following Pokemon: a lv. 37 Nidorino, a lv. 37 Rhyhorn, a lv. 35 Kangaskhan, and a lv. 41 Nidoqueen. After defeating him, Team Rocket will leave the building and the city. Go to the old man sitting on the sofa, and talk to him. He's the president of Silph Co., and he'll give you the Master Ball. There is only one Master Ball in the whole game, and it catches Pokemon 100% of the time. Now that this problem is taken care of, get out of Silph Co. and head north to the Fighting Dojo. You'll be challenged by four trainers inside the Fighting Dojo. They all use Fighting Pokemon, who are weak against Psychic and Flying Pokemon. After challenging the four trainers, the leader, who has lv. 37 Hitmonlee and Hitmonchan, will challenge you to a match. After defeating him, you will be able to take a free Hitmonlee (left PokeBall) or Hitmonchan (right PokeBall). After this, it's time to go to the real gym to get your fifth badge. The real gym is right next door of the Fighting Dojo. The trainers here use Psychic Pokemon, so Dark Pokemon/attacks will be quite effective here. This gym is filled with warp squares that take you to different rooms, and in order to get through them quickly, follow these steps once you reach the first room.
There are two ways to reach the next city, which is Fuschia City. One way is to start from Celadon City and go through Routes 16, 17, and 18. This will take you through the Cycling Road, and is the prefered route for most people. The other way to get to Fuschia is to start at Lavender Town, and go along the coast through Routes 12, 13, 14, and 15. Going through to Cycling Road is the faster solution to getting to Fuschia City. To begin, go west from Celadon City onto Route 16. Go through the Guard House, and you'll be on the Cycling Road (you must have a bike!). On this road, you go downhills, which means that your bike will move by itself without any action from you. However, if you try to go up the hill, you will be going very slowly. There are many Bikers that you can fight on this road, which takes up Routes 16 and 17. After a long bit of biking, you'll reach Route 18.
Go through the Guard House after reaching Route 18. A trainer on the second floor will trade you his Lickitung for your Golduck. Route 18 is real short. After a few steps, you'll arrive at Fuschia City. Some people may choose to do things the harder way. The other way to get to Fuschia is slower and longer. To begin, fly to Lavender Town. Go south onto Route 12. Go to the second floor of the Guard House, where a little girl will give you TM 27 - Return. For the rest of the route, you'll be battling Fishermen. You'll also be able to fight two lovers in a two-on-two match.
 Around halfway through Route 12, you'll encounter another sleeping Snorlax who's blocking the road. You must use your PokeFlute to wake him up and catch it or defeat it. There's a house on this route with a Fisherman inside who'll give you the Super Rod, which is the best Rod in the whole game. After that, you can cut a tree, fight the trainer that's enclosed, and pick up an Iron. After going on Route 12 for a long time, you'll soon begin traveling on Route 13.
Route 13 is mainly a maze filled with trainers. This maze is quite easy to get through, and most of the trainers can be avoided. Route 13 ends when the maze ends, and marks the beginning of Route 14. Route 14 is simply going south. You'll have another opportunity to have a two-on-two match with the Twins. After a short Route 14, you'll get to Route 15. You can find TM18 - Rain Dance by cutting the tree and going all the way to the end. Here, you'll be able to fight in another two-on-two match with Fighting Pokemon. One of Prof. Oak's aides is in the Guard House that marks the end of Route 15. If you have captured at least fifty Pokemon, he'll give you an Experience Share. This is a very useful item in that it shares battle experience with all the Pokemon on your team. Finally, you'll arrive at Fuschia City. Fucshia City is the home of the Safari Zone, an area filled with capturable wild Pokemon. Right now, you can visit the Move Deleter's house, which is located right next to the Pokemon Center, to delete an unwanted move. Visit the house next to the house with the mailbox for a Good Rod. We'll visit the Safari Zone later. For now, we need to fight the gym leader of this city's gym. It's time for you to get your sixth badge in the Fuschia Gym. However, getting to the gym leader may not be as easy as you think. The gym is filled with invisible walls. You have to walk around and figure out which areas you can go through and which ones you can't. Start on the right side, with the trainers serving as markers. Although they are invisible, a close observer would see that white dots mark the outlines of the walls.
Soon, after trial and error or by getting around the dots, you'll reach Koga, the gym leader. He has two lv. 37 Koffing, a lv. 39 Muk, and a lv. 43 Weezing. Psychic Pokemon will work best against Koga's Pokemon. After beating four tough Pokemon, Koga will award you with TM06 - Toxic and the Soul Badge. In order to leave, you must go through the walls again.
Now that you've defeated Koga, you're only two more badges away from eight! For now, put the thought of getting the last two badges away, because we need to go into the Safari Zone for some item searching. Go into the Safari Zone, which can be found in the northern part of the city. It'll cost $500 to get into the Safari Zone. They'll give you thirty Safari Balls, which is used exclusively to capture Safari Zone Pokemon. Your mission now is to find the Surfer's House, which is deep inside the Safari Zone, and get HM03 - Surf. Your other mission is to find Gold Teeth. You have 600 steps before your time runs out; good luck!
Important items contained in Itemballs in the Safari Zone include the Gold Teeth, Leaf Stone, Protein, TM11 - Sunny Day, TM47 - Steel Wing, and TM32 - Double Team. After finding the two "mission" items listed above, head to the Warden's house (the house with a mailbox next to it) in the eastern part of the city. Give the Warden the Gold Teeth, and he'll give you HM04 - Strength. Teach the new HM to a Pokemon, and move the boulder that's blocking the Itemball. Then pick up the Rare Candy. Your trip to Fuschia City is over. Now that you have Surf, you'll be able to catch two legendary Pokemon: Articuno and Zapdos. To catch Articuno, you must go south from Fuschia City, and go west through the sea routes of 19 and 20. There are many swimmers waiting to battle you. You'll get past them pretty quickly. Soon, you'll arrive at one of the two Seafoam Islands.Once you enter, go right and push the boulder into the hole using Strength. Go to the other side (past the first ladder you see), and push the other boulder into the other hole. Go back to the original hole, and fall into it. Keep on pushing the boulder and following it (falling into the holes with the boulder) until you reach the water. Once you do, the current will take you to another level. Go up onto the land, left, and down all the way for an Ultra Ball. Take the only ladder to another level. Follow the path south and you'll find a puzzle involving a few holes and plenty of boulders.
 Push the only boulder that you can push left all the way left so that it doesn't block your way. Next, push the single boulder into the hole. Now you'll have to work on the last two boulders. Push the one on the right all the way up, and find a way to push the other boulder into the other hole. Now jump into that hole. You'll reach another level. Surf up and you'll meet Articuno.
After the encounter with Articuno, go onto land and take the ladder. Go down afterwards and take another ladder. Go right and pick up the Pearl. Go right to take another ladder that'll lead you to a Water Stone. Come back, go up the steps, and take the ladder. Push the boulder that you've pushed in the beginning into holes and follow it. Do this until you reach water. The current will be blocked, and you'll be able to go onto land. Follow the path, and soon, you're out of the Seafoam Islands! Before you go to catch Zapdos, make sure that you have plenty of Ultra Balls, Great Balls, and preferably, a Pokemon that can put another Pokemon to sleep or paralysis. Fly to Route 10, go north from the Pokemon Center, and begin surfing in the water. Surf all the way south until you reach land. You have reached the Power Plant. Deep inside here, you'll find Zapdos.
 The Power Plant is filled with Electric Pokemon and many Itemballs. Some of these Itemballs are actually Electrode trying to trick you into picking them up. The most they'll do is some damage. Don't be afraid of running into an Electrode; try to pick up every Itemball to make sure that you don't miss any items, especially TM25 - Thunder and the Thunderstone. The Power Plant is pretty easy to navigate. Soon, you'll find a lv. 50 Zapdos. Here's a tip that a trainer must always follow: save the game before fighting it, and restart the game to catch it again if you make it faint. Fly to Pallet Town, and go south onto Route 21. Surf all the way south. Soon, you'll reach Cinnabar Island. Cinnabar Island is a small island that's packed with buildings and full of things to do. On this island, you'll find the typical Pokemon Center and PokeMart, a gym, the Cinnabar Mansion, a research center, and two people standing outside. The first thing we'll do is go into the Pokemon Lab. You received either a Helix Fossil or Dome Fossil earlier in the game in Mt. Moon, and an Old Amber too. Now you can bring these fossils to life in the Pokemon Lab, an oval-like building. Find it, and go inside. The first room has two people who'll trade Pokemon with you. The old man will trade you his Electrode for your Raichu, (what a bad deal!) and the lady will trade you her Tangela for your Venonat. (Better.) There's a Move Tutor in the second room who will teach Metronome. Talk to the scientist in the third room, and he'll resurrect your fossils. Wait for a while and come back. He'll have an ancient Pokemon ready for you after a bit of walking. You'll notice that the Cinnabar Gym is locked. The key that'll unlock the door can be found in the Pokemon Mansion.
The Pokemon Mansion is an old mansion just above the Pokemon Center. Once you're inside, head straight and then up the stairs, which will take you to the second floor. You'll find Zinc and Calcium on this floor. After picking up the items, head to the northwest corner of the floor, and take the stairs to the third floor. Go all the way right and pick up the Iron. Go back and press the switch on the statue. Go down, and you'll see a scientist. Go past him and fall through the larger broken floor. You'll then fall into another section of the first floor. Fight the Scientist and go near the stairs. Pick up the Carbos, and go downstairs into the basement.
The Power Plant is filled with Electric Pokemon and many Itemballs. Some of these Itemballs are actually Electrode trying to trick you into picking them up. The most they'll do is some damage. Don't be afraid of running into an Electrode; try to pick up every Itemball to make sure that you don't miss any items, especially TM25 - Thunder and the Thunderstone. The Power Plant is pretty easy to navigate. Soon, you'll find a lv. 50 Zapdos. Here's a tip that a trainer must always follow: save the game before fighting it, and restart the game to catch it again if you make it faint. Fly to Pallet Town, and go south onto Route 21. Surf all the way south. Soon, you'll reach Cinnabar Island. Cinnabar Island is a small island that's packed with buildings and full of things to do. On this island, you'll find the typical Pokemon Center and PokeMart, a gym, the Cinnabar Mansion, a research center, and two people standing outside. The first thing we'll do is go into the Pokemon Lab. You received either a Helix Fossil or Dome Fossil earlier in the game in Mt. Moon, and an Old Amber too. Now you can bring these fossils to life in the Pokemon Lab, an oval-like building. Find it, and go inside. The first room has two people who'll trade Pokemon with you. The old man will trade you his Electrode for your Raichu, (what a bad deal!) and the lady will trade you her Tangela for your Venonat. (Better.) There's a Move Tutor in the second room who will teach Metronome. Talk to the scientist in the third room, and he'll resurrect your fossils. Wait for a while and come back. He'll have an ancient Pokemon ready for you after a bit of walking. You'll notice that the Cinnabar Gym is locked. The key that'll unlock the door can be found in the Pokemon Mansion.
The Pokemon Mansion is an old mansion just above the Pokemon Center. Once you're inside, head straight and then up the stairs, which will take you to the second floor. You'll find Zinc and Calcium on this floor. After picking up the items, head to the northwest corner of the floor, and take the stairs to the third floor. Go all the way right and pick up the Iron. Go back and press the switch on the statue. Go down, and you'll see a scientist. Go past him and fall through the larger broken floor. You'll then fall into another section of the first floor. Fight the Scientist and go near the stairs. Pick up the Carbos, and go downstairs into the basement.
In the basement, go into the room to your left, and switch the Mewtwo statue so that's its eyes aren't glowing. Head up into another room to pick up TM14 - Blizzard. Flip on the Mewtwo statue in the other room to pick up two items. One of them is the Gym Key, which unlocks the Cinnabar Gym; the other is TM22 - Solar Beam. Now that you've gotten what you came for, it's time to leave this mansion and go to the gym. Before you fight the Gym Leader of Cinnabar Gym, you must go past six trainers. You will either answer a question right to get pass them without a battle, or you'll have to battle them. To answer a question and get to the next room, you must go to the Quiz Machine, and answer "Yes" or "No" to the question asked. Here are the answers to all six quizes: Yes, No, No, No, Yes, No The gym leader's an old, bald man named Blaine. He uses powerful Fire Pokemon. Use Water Pokemon to put Blaine's Pokemon out. He has the following Pokemon: a lv. 42 Growlithe, a lv. 40 Ponyta, a lv. 42 Rapidash, and a lv. 47 Arcanine. After defeating Blaine, he'll give you TM38 - Fire Blast and the Volcano Badge. Right when you exit the gym, Bill will come to you and ask you for help. If you want to help him, he'll take you aboard a ferry and bring you to the first Sevii Island. There are seven Sevii Islands in total. The Sevii Islands contain legendary Pokemon and Pokemon from the Johto region. A victory at the Cinnabar Gym gives you access to the first three islands. The next four islands can be accessible only after defeating the Elite 4. Right after arriving on the first Sevii Island, also known as Knot Island, Bill will take you to the Pokemon Center and lead you to a huge machine with his friend, Celio, standing next to it. Bill tells you that the machine is broken, and he needs you to find the parts to fix the machine. He gives you a Meteorite from Mt. Moon, a Tri-Pass for ferries to get the One, Two, and Three Island, and a new addition to your Town Map that contains a map of the Sevii Islands. Heal your Pokemon and get out of the Pokemon Center. Surf in the northeast direction. You'll reach land almost immediately. In this area, known as Kindle Road, you'll be battling trainers and catching Pokemon. There are Itemballs behind breakable rocks, which can be broken using Rock Smash. Head north and enter the Ember Spa. Inside is a hot spring where you can heal your Pokemon by dipping yourself in the water. Talk to the old man next to the waterfall to get HM06 - Rock Smash. Head north from the cave with the hot spring, and you'll reach a beach. Surf north, and you'll reach Mt. Ember. Here, you'll be able to catch Moltres. After going inside the mountain, head left and push the boulders away using Strength. Follow the path and smash the rocks. Next, you'll see three sets of stairs. Take the the left or center stairs and go left. Fight the trainer, and go into the entrance right up ahead.
 There's only one way to go in here, so it's pretty easy to navigate. Once you get out, take the stairs up. Go to the left side for a hidden Fire Stone in a boulder below the stairs. Another Fire Stone can be found by solving the easy boulder puzzle on the right side. After getting both Fire Stones, head up the stairs again. Now you'll face another puzzle, this one a little bit more difficult than the last one, but still isn't difficult at all. After getting through the puzzle, a lv. 50 Moltres awaits you. Fly back to the island's Pokemon Center from Mt. Ember, and go south. You'll reach the dock where you first arrived at the island. Take the Ferry to Two Island.Two Island, or Boon Island, is simply a small village. Once you get onto the island, go east into a nice looking tan colored house with a blue roof, the Game Corner. This Game Corner isn't like the Game Corner in Celadon City with slot machines; this place let's you play mini games called Pokemon Jump and Dodrio Berry-Picking with a friend. A little girl's father will ask you to save his daughter, Lostelle. This rescuing is all done on Three Island. For the guide on Three Island, click on "Next" below.
 For now, you can go all the way north to the Move Tutor's house, located in a small region called Cape Brink. This Move Tutor teaches your starter Pokemon moves for free. She teaches one of three moves, depending on your starter Pokemon: Frenzy Plant (Grass), Blast Burn (Fire), or Hydro Cannon (Water). These moves all do 150 damage, which is a lot. Be sure to have your starter in the first slot before talking to the Move Tutor. Now you'll need to go to Three Island to save the man's daughter. Once you arrive on Three Island, also known as Kin Island, you'll see a woman surrounded by Bikers of the Kanto Rider Federation. Go north and you'll see even more Bikers. You'll have to fight four Bikers consecutively. After defeating the fourth, the Bikers will leave. Talk to the nearest person for a Full Restore. Go all the way to the north and cut the tree on your right. Go down for a Zinc. Go west into the grassy areas, known as the Bond Bridge. Follow the path: get past the grassy area, bridge, and the beach, and go into the forest.
 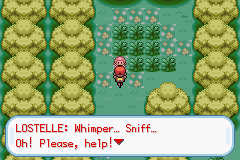 This forest requires a lot of tree cutting, but is pretty easy to get through. It's not necessary to cut tress at all, but it does make your trip faster. Go to the very end of the forest, where you'll find a little girl. That's Lostelle, the girl you've been trying to find. Talk to her, and she'll tell you a Pokemon has been scaring her. Then you'll find yourself fighting a lv. 30 Hypno. After defeating/capturing/running from the wild Hypno, Lostelle, who was picking Berries, will give you an Iapapa Berry. After that, you'll be taken back to the Lostelle's house on Two Island. Talk to the Lostelle's father to give him your Meteorite, and he'll give you a Moon Stone. Mini games can now be played in this house (the Game Corner) through the use of a Wireless Adapter. Go back to One Island and talk to Bill, who's still inside the Pokemon Center. He'll take you back to Cinnabar Island. Whenever you want to access the Sevii Islands again, simple go to the port in Vermilion City to take the Ferry. It's now time to get your final badge, which takes us to Viridian City. You're back in Viridian City. You were here when you first began your journey; now you're here for your eigth and final badge. Go into the Viridian Gym, where you'll see a familiar maze. You've seen this spin maze in Team Rocket's Hideout in the Game Corner, and you're about to go through another one. This maze is pretty easy, and you'll wind up with the gym leader somehow.
The gym leader is Giovanni. As you know already, he's the leader of Team Rocket. He uses a lv. 45 and lv. 50 Rhyhorn, a lv. 42 Dugtrio, a lv. 44 Nidoqueen, a lv. 45 Nidoking. Water-type attacks can take care of his Pokemon pretty easily. After defeating Giovanni, he'll give you TM26 - Earthquake, and your final badge: the Earth Badge. Afterwards, he will leave, and so will you.
Now that you have all eight of your badges, it's time to go to the Pokemon League, where you'll face the Elite Four, the toughest trainers yet. Now you must heal your Pokemon and head west from Viridian City onto Route 22.
Gary will come to battle you in the same spot where you battled him on this route last time. The last time you fought him here, his Pokemon were weak. Now, however, you should really watch out. All of his Pokemon are near or above lv. 50, so your Pokemon should be trained to about the same level. After beating Gary, follow the road and head west into the Pokemon League's Front Gate, which takes you to Route 23. You'll go through eight guards, each checking for one of the eight badges. After getting past all eight guards, you'll reach the cave known as Victory Road. Once you get in, you'll see a boulder. Use Strength to push that boulder to the ground switch on the right. Now head up the stairs, and go on until you see two other stairs between a trainer: one on the left and one on the right. Take the stairs on the right for a Rare Candy and TM02 - Dragon Claw. After getting the items, take the stairs on the left, and go up the ladder.
Go down and push the boulder onto the switch. Go up the stairs, and head east. If you choose to go down the stairs, you'll find TM37 - Sandstorm. No matter what you do, you'll need to go up the ladder located at the very end of this level. Before you take the ladder, be sure to pick up TM07 - Hail above the ladder.
Once you reach the next level, push the boulder you see up two times, and all the way west onto the switch. The Itemball you see contains TM50 - Overheat. Now head back to where you came from, and go up the stairs. Go all the way west, down the stairs, and all the way east. Push the boulder down the hole, and jump in with it. Push the boulder to the switch on the left. Head up the stairs, and then the ladder. Then you'll encounter a two-on-two Pokemon battle. Take the other ladder, go right, and you'll find a Move Tutor who teaches Double Team. Finally, you can exit Victory Road.
After all that, you'll reach the Indigo Plateau, where you'll fight in the Pokemon League. You'll definitely want to heal your Pokemon once you get into the Pokemon League building. Go into the PC, and draw out any Pokemon you want to use during battle. Stock up on some essential items, such as Full Restore and Revive. After that, save the game in case you lose, and talk to the official standing by the entrance. Go inside, and get ready to battle the Elite Four!The first member of the Elite Four is Lorelei. She uses Ice and Water Pokemon. Her Pokemon are listed below:
The second member of the Elite Four is Bruno. He uses Fighting and Rock Pokemon. His Pokemon are listed below:
The third member of the Elite Four is Agatha. She uses Ghost and Poison Pokemon. Her Pokemon are listed below:
The fourth member of the Elite Four is Lance, also known as the Dragon Champion. He uses Dragon Pokemon. His Pokemon are listed below:
After battling the Elite Four, you might think it's over. But it's not over the yet; it's time to face the real champion: Gary!
Gary's the champion. He has a full team of strong Pokemon. Defeating him requires a lot more strategy than the Elite Four. Below are his Pokemon.
The Hall of Fame
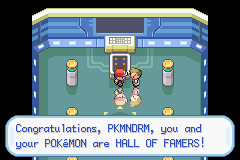 After defeating Gary, Prof. Oak will come to talk to you. After a short conversation, he'll lead you into the back room, and enter your Pokemon and yourself into the Hall of Fame. You are now a Pokemon Master!
After you and your Pokemon have been honored, you, Gary, and Prof. Oak will leave the building. Immediately afterwards, the credits will start to roll, and you'll be running home. You've completed the game. All you have to do now is sit back and watch the ending. Well, if that was what you thought, then you're wrong! The game isn't over yet!
After defeating Gary, Prof. Oak will come to talk to you. After a short conversation, he'll lead you into the back room, and enter your Pokemon and yourself into the Hall of Fame. You are now a Pokemon Master!
After you and your Pokemon have been honored, you, Gary, and Prof. Oak will leave the building. Immediately afterwards, the credits will start to roll, and you'll be running home. You've completed the game. All you have to do now is sit back and watch the ending. Well, if that was what you thought, then you're wrong! The game isn't over yet!
What More Is There To Do?
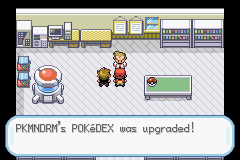 The game will restart itself, and you'll be back in Pallet Town. If you've captured more than sixty Pokemon now, Prof. Oak will upgrade your PokeDex, along with Gary's. After the upgrade, you'll find a "National" section, which can display up to 386 Pokemon. With this PokeDex, you can explore the rest of the Sevii Islands and catch Johto Pokemon (Pokemon that appeared in Gold/Silver/Crystal versions).
Of course, that's not all. After defeating the Elite Four, the legendary beasts from Gold/Silver/Crystal will appear randomly in Kanto. The legendary beast that will appear will depend on the starter Pokemon you chose. Either Entei (Bulbasaur),Suicune (Charmander), or Raikou (Squirtle) will appear. They are all at lv. 50, and are very hard to meet and catch. (Ooooooohhhhhhhhh!!!!!)
The game will restart itself, and you'll be back in Pallet Town. If you've captured more than sixty Pokemon now, Prof. Oak will upgrade your PokeDex, along with Gary's. After the upgrade, you'll find a "National" section, which can display up to 386 Pokemon. With this PokeDex, you can explore the rest of the Sevii Islands and catch Johto Pokemon (Pokemon that appeared in Gold/Silver/Crystal versions).
Of course, that's not all. After defeating the Elite Four, the legendary beasts from Gold/Silver/Crystal will appear randomly in Kanto. The legendary beast that will appear will depend on the starter Pokemon you chose. Either Entei (Bulbasaur),Suicune (Charmander), or Raikou (Squirtle) will appear. They are all at lv. 50, and are very hard to meet and catch. (Ooooooohhhhhhhhh!!!!!)
AND THIS is where I'll be leaving you, my dears. Toodle-oo!
Annie OUT.
Kanto walkthrough (FireRed/ LeafGreen):
So, first talk with Professor Oak, tell him everything he needs to know (name, gender [seriously, he can't tell if you're a male or a female -.-], rival's name [POOPY], etc...). (Even if he acts like a creepy pedophile!) Next, go to YOUR PC (THIS IS IMPORTANT) and take out a Potion. (Stand in front of it, then press A.) Then, go downstairs, talk to your mom, and go outside. Go north into the grass area. Prof. Oak (read:Pedophile!!!!!) will come to tell you that it's dangerous to go on without a Pokemon. He'll take you to his lab, where your rival (known as Gary from now on) is waiting. He asks you to choose a Pokemon. Go to the table with the three PokeBalls and choose the Pokemon of your choice. (The best choice is Bulbasaur, cause it's strong against Brock's pokemon while you haven't caught anything better. You can capture a water type pokemon LATER.) Gary will come over and choose the Pokemon that has a type advantage over yours. (This is what I really hated in the games... I was never able to beat Gary's Venusaur. Yes, I chose Squirtle. Problem?) For example, if you pick Squirtle, then he'll pick Bulbasaur. (MY POOR SQUIRTLE!!!!! BEAT UP BY GARY'S HEARTLESS BULBASAUR!!!!! WAAAAAAAAAAAAHHHHHHHH...) As you leave the lab, Gary will challenge you to a battle. If you win, your starter will automatically get elevated to level 6, and you will get MONEY!!!!! (MONEY MONEY MONEY!!!!! *Forgets completely about Squirtle*) Ok, then go out of your only home, (sniff... sniff...) and onto Route 1. Catch more Pokemon and level up your starter! Talk to the first person you see for a free potion. (You know, it's kinda weird... you go up to all these strangers and talk to them. Ever heard of stranger danger?????) Once you get to Viridian, go NorthWest to a narrow hallway. You will find a PokeBall on the ground. (Dun da da! Wild PokeBall appeared!) Investigate, (again, go in front of it and press A) and you will get a Potion. (By the way, I really love those PokeBalls. Haha, that just sounds wrong. PokeBalls? I have a perverted mind. >_<) Then, go to the PokeMart (Prof. Oak will tell you where that is and what that is) and talk to the dude at the counter. He will tell you that there's a package for the old dude, (AKA Prof. Oak) and he needs you to do it. (DOING STRANGERS FAVORS????? I THOUGHT I TAUGHT YOU BETTER THAN THAT!!!!!) There is nothing to do now in Viridian, so head back to Pallet. (You can jump over the ledges to avoid tall grass) Once you're back in Pallet, give the old dude his package. Gary will come back! (Whoa, he hasn't left yet? Wow.) The old dude will give you stuff which I am not allowed to disclose the identity of. XD Anyway, leave Old Dude's house and go to the house right next to yours and talk to the girl inside. She is Gary's older sister (GASP! HE HAS ONE?) Daisy, and if you talk to her, she will give you a Town Map. Embark on your journey TO VIRIDIAN CITY!!!!! Wait, I've already been there. Oops. Go WEST once in Viridian and go to Route 22. You can battle Gary again! (Yay. Note sarcasm. Here comes Gary and his powerhouse Bulbasaur, oh no I can't beat them! Help meeeeeee!!!!!!!!!!!!!!!!!) He now has 2 Pokemon, so be careful and train before you do battle him. The Pokemon are a bit stronger then before, but no worries, you will be, too! After you battle him, go to heal your Pokemon and buy stuff. Don't try to challenge the gym. (I did once, and it was the biggest waste of time I have ever encountered in my entire life of playing Pokemon.) Go to Route 2 and another old dude will show you how to catch a Pokemon. (Of course you could catch one before he teaches you how to, but still.) Then he will give you a Teachy TV which you can use if you have questions about stuff in the game. (TEACHY TV????? AHAHAHAHAHAHAHAHA!) You will not be able to access the full Route 2 because it is blocked. Plain and simple. After you get through Route 2, you will come to the Viridian Forest, and you will have to make your way through it without mah help. After you get through it, you arrive in Pewter City. Prepare for your gym battle with Brock, and when you're ready, go to... drumroll... THE PEWTER CITY GYM!!!!! Dun dah dah... So, battle Brock and his minions and kick their butts! You will acquire THE BOULDER BADGE!!!!! And a few other items, but they're not important. Before you leave Pewter, a colleague of Old Dude #1 (Oak) will run up to you and give you RUNNING SHOES!!!!! YAY!!!!! Now you can travel faster by pushing B. Too bad you have to push it all the time. Leave Pewter and go to Route 3. There will be a lot of trainers there waiting to crush you 'cause they think they're all high and mighty, but if you're strong by now, you can crush them instead. Fight every trainer you see 'cause you'll get stronger, and then you can kick more butts. At the end of Route 3, go into the Pokemon center and heal up. There will be a guy who offers to sell a Magikarp for "ONLY" $500, but DO NOT BUY THAT. It was the biggest mistake I had ever made. I would suggest fishing for one instead 'cause they're so easy to catch and stuff. Go out of the Pokemon Center, and you'll be at the FOOT of MT. MOON. Mt. Moon is a maze with a few trainers and some good items. None of the starters have a good advantage in here, as the Pokemon here are of many different types.If you are lucky, you'll find a rare Clefairy. (I WAS SO LUCKY AND FOUND ONE!!!!! You wouldn't BELIEVE how happy I was.) When you've finally reached the end of Mt. Moon, you'll see two shell-shaped fossils. One is the Dome Fossil (which can be turned into a Kabuto), and the other one is the Helix Fossil (which can be turned into an Omanyte). A trainer owns both of them, and he will fight you. Beat him, and he'll share a fossil with you. You can only take one of them, not both. After taking your fossil, it's time to leave Mt. Moon. (WAAAAAAA!!!!! It was fun beating up Team Rocket jerks and getting cool items!) Go onto Route 4 and make it through to Cerulean City, home of the second Gym. Heal your Pokemon and stock up on items. You won't be battling in the Gym first. Gary is waiting patiently for you. (Oohhh! I get to battle Gary again! Yay! Note sarcasm AGAIN. It really annoys me how much I have to battle him.) Go north from Cerulean City towards Nugget Bridge, on Route 24. Gary will come and greet you, and will challenge you to a battle. He has the following Pokemon: lv. 17 Pidgeotto, lv. 15 Rattata, lv. 15 Abra, and lv. 18 of his starter Pokemon. This should be a much more challenging match than the last one. A Pikachu (can be caught in Viridian Forest) would help out a lot if you chose Charmander as your starter. This is because both Pidgeotto and Squirtle, the toughest Pokemon on Gary's team, are weak to Pikachu's attacks. After one real tough battle, Gary will give you a Key Item known as the Fame Checker. This is used to identify trainers whom you've previously battled. Go back to town now and heal your Pokemon, and continue traveling on the Nugget Bridge. There are six trainers on Nugget Bridge that you must fight to get past. The sixth trainer is actually a member a Team Rocket. Beat him, and he'll give you a Nugget that you can sell for $5,000. (OOOHHHH!!!!! MONEY MONEY MONEY!!!!!) After that, go on to Route 25. There are tons of trainers waiting to battle you on Route 25. But that isn't the main reason you've come upon this route. You want to meet a scientist named Bill. Go all the way to the end of Route 25, and you'll arrive at a house called Sea Cottage. Go inside, and you'll see a Clefairy. It turns out that something went wrong with Bill's experiment, and the Clefairyis actually him. Talk to him, and he'll go inside his machine. Press "A" against his computer, and he'll be transported to the other end of the machine. Finally, he'll come out as Bill, a human scientist. Talk to him again, and he'll give you a S.S. Ticket for the S.S. Anne in Vermillion City. Now that that's taken care of, it's time to go back to Cerulean City and challenge the gym leader!Cerulean City is the city of water. Naturally, Water Pokemon are what the trainers in the Gym use. There are two trainers you must battle before battling the gym leader, Misty.
Misty uses a lv. 18 Staryu and a lv. 21 Starmie on you. A Charmeleon under lv. 25 without any assistance would most certainly lose now. Of course, it's a totally different story with a Ivysaur. (TOLDJA SO!!!!! :P) Now you can leave Cerulean City by going to the house with a policeman outside in the north-eastern section of the city. The house is a mess inside, because a Team Rocket member in the backyard has dug into their house. Fight that Rocket! Tee hee! Now that you're on the other side, go south, and you'll find a house. That's the Day Care Center. The old man inside will raise your Pokemon's level ($100 for each level) if you leave it with him. The only bad thing is that your Pokemon might learn some unwanted moves, and delete moves that you want. The good thing is, if you were to leave a weak Magikarp with him, and walk for a while, it'll be able to evolve in no time into a powerful Gyarados! I highly suggest that you catch a Meowth on Route 5. Meowth is a special Pokemon in that once in a while an item mysteriously attaches to it. Many times the item is a Berry, but the items are not just limited to Berries. The entrance to Saffron City is closed, so you'll have to detour through the Underground Path to the next route. Before entering the Underground Path, talk to the little girl if you want to trade your male Nidoran for her female Nidoran. You'll walk a long walk in the dark Underground Path. Soon, however, you'll see the daylight of Route 6. Route 6 has six trainers waiting to fight but you can get by with fighting only two of them if you want. There's a lot of grass but no new Pokemon. Head to Vermilion City since once again the entrance to Saffron City is closed. Go all the way south, and you will arrive at Vermilion City.The house at the north-western corner has a Fisherman who'll give you an Old Rod, which allows you to catch Magikarp. Go south a bit, and you'll find two houses to the left. One of the houses is where you can trade aSpearow for a Farfetch'd. The other house is the Pokemon Fan Club. Talk to the chairman inside to get a Bike Voucher.
In the Pokemon Center, talk to the girl standing in front of the counter for a VS Seeker. This device allows you to rechallenge trainers who have trained their Pokemon to be even stronger than the first time you battled them. To activate the VS Seeker, simply stand around a couple of trainers and select the item. Trainers who are hopping around are the ones who will battle you again.
Now go back to Cerulean City, get yourself a bike from the Bike Shop, and come back in style! (I love mah bikes...) The S.S. Anne may seem small, but it's huge inside. It can be found by going south of Vermillion City, and "flashing" your S.S. Ticket to the guard. If you explore each and every room inside, you'll find tons of trainers and quite a few items. A girl in the second room from the right on the main deck can heal your injured Pokemon. In the ship's kitchen, you'll be able to find your first Berries, three of them to be exact, in the trash cans. From now on, all Berries will be stored in your new Berry Pouch. To end your stay at the S.S. Anne, fight Gary on the second floor.
After beating him, go up to the captain's cabin. He's seasick and puking. Rub his back and he'll give you something. Not giving it away. Now leave the ship. When you're outside, the ship will sail away. Remember: if you don't get Cut, the ship won't leave. If you want the S.S. Anne to stay, lose to a trainer after getting Cut. Now teach Cut to one of your Pokemon, and you're ready to go to the gym. (Might not make sense with all that cut stuff, but you can infer pretty well that you get the move CUT by rubbing the captain's back.) Cut the tree blocking the path to the gym and go inside, where you'll face a few trainers who use Electric Pokemon. Now comes the hard part: Lt. Surge, the gym leader, has put electric locks on the door that leads to him, so you'll have to solve a puzzle. There are a bunch of trash cans. Press "A" on every one of them until it says that you've found and flipped a switch. You need to flip two switches for the door to open, so you'll need to find the second switch. The second switch is always either is always either above, beside, or below the first one. If you get it wrong, the switch will be reset, and you'll have to do everything over again. This is a very tricky and sometimes annoying puzzle, (SOMETIMES ANNOYING???? I NEARLY THREW MAH DS ACROSS THE ROOM THE FIRST TIME I PLAYED IT!!!!!) but hopefully, you'll get it sooner or later. And when you do open the doors, it's time to fight Lt. Surge.
Lt. Surge has the following Pokemon: a lv. 21 Voltorb, a lv. 18 Pikachu, and a lv. 24 Raichu. Beating him with a Ground-type Pokemon is as easy as tossing a PokeBall, and catching one is easy too. You can catch a Diglett or even a Dugtrio in the nearby Diglett's Cave. If you beat him, he'll give you TM34 - Shock Wave and a Thunder Badge. If you go east from Vermilion City, you'll find Diglett's Cave on Route 11. This cave is no maze. It's simple to go through since there's only one road. There are no items to pick up. The only Pokemon you'll find are Diglett and the occasional Dugtrio. Head inside and go to the other end to go back to Route 2 for some important business. After you exit the cave, you'll revisit Route 2. But this time, it's the other half of the route that you weren't able to explore before. Go south, and you'll find a house. Inside, a guy is willing to trade his Mr. Mime for your Abra.
The next house has one of Prof. Oak's aides in it. If you've collected ten or more Pokemon he will give you HM02 - Flash. It's used to illuminate dark caves and tunnels. Keep on going for two items.
Go back through the cave and go east when you get out. You'll be on Route 11. There are many trainers, many items, and a whole lot of grass. When you reach the gate, one of Prof. Oak's aides will be upstairs. If you have caught up to thirty Pokemon, he'll give you an Item Finder. This item helps you detect hidden items that cannot be seen. There's also another trainer that'll trade you a Nidorina for a Nidorino. You can't go to the other side since there's a Snorlax blocking the way. Now go back to Cerulean City and cut the tree that was blocking the way. Then you'll get onto Route 9. On Route 9 you'll be battling many trainers. Here, you'll find TM40 - Aerial Ace. To reach the end of this route, just keep on going east, where you'll arrive at Route 10. Route 10 is short for now. You'll see some water. When your Pokemon learns Surf, it can surf to the Power Plant, just south of Route 10. Make sure that you have taught one of your Pokemon the Flash HM in order to enter Rock Tunnel.
There's a Pokemon Center for you to heal your Pokemon here. One of Prof. Oak's aides is here. If you've caught at least twenty Pokemon, he'll give you the Everstone. Let your Pokemon hold the Everstone, and they won't evolve. (Now why would you want to do that?) Rock Tunnel requires that your Pokemon know Flash, otherwise, you'll only be able to see a tiny bit. Like Mt. Moon, Rock Tunnel is a maze. There are items, trainers, and new Pokemon here. Here, you'll meet a Pokemon every eight to ten steps, which is more than normal. Use Repel if you don't want to meet too many wild Pokemon. After you exit the tunnel, you'll fight a few trainers, and will then be heading to Lavender Town. Lavender Town has no gym, so you won't be able to do much here. Later though, you can catch Ghost Pokemon in the Pokemon Tower when you get a Silph Scope. Without it, your mission in the tower won't be complete, and all the Ghost Pokemon won't be identified. For now, you can battle Gary in the tower on the second floor. Gary's team now greatly varies depending on who you chose for your starter at the beginning of the game. Once you get the Silph Scope, you'll find Mr. Fuji at the top of the foggy tower, and he'll give you a PokeFlute that's used for waking up Snorlax and other Pokemon. Now, visit the Name Rater if you want to, who'll be able to change the name of your Pokemon. Then shop for new items in the PokeMart. Finally, go west to Route 8. Route 8 has trainers and new Pokemon. On Route 8, you'll have your first two-on-two battle with the Twins. Saffron City still can't be accessed, so go inside the Underground Path. There's not much to do in Route 7. The guards are still thirsty, so go on to Celadon City. Celadon City is the largest city in this game. Its PokeMart has six stories; no wonder it needs an elevator! They sell all sorts of things. You'll be able to buy TMs and normal items (such as Potion and Antidotes) on the second floor. On the third floor, you'll see many people playing Game Boy Advances. Talk to the person at the register, a Move Tutor, and he'll teach one of your Pokemon the move Counter. The fourth floor has many evolution stones you can buy to evolve certain of Pokemon (ex. Eevee) for $2100 each. On the fifth floor, you'll be able to buy items such as X Attack and Calcium. These are items that modify a Pokemon's stats so they can do better in battle. Finally, you'll reach the rooftop, where you'll find three vending machines and two people, including a little girl. Get a Fresh Water, a Soda Pop, and a Lemonade from the vending machine, and give it to the little girl one at a time. She'll give you TM16 - Light Screen, TM20 - Safeguard, and TM33 - Reflect, respectively, for your drinks. There is huge building to the right of the department store that's nearly empty inside. Talk to the old lady who's surrounded by Pokemon on the first floor. She'll give you Tea, which you can give to any one of the Saffron City guards so they can let you through. You'll also find the game's programmers in this building, one of which will tell you to return after getting all the Pokemon. He'll give you a diploma for catching all the Pokemon. Now leave the mansion, and go in through the back door. Go all the way to the rooftop, where you'll find a small building. Inside you'll find a person and a PokeBall on the table. Pick it up; it's an Eevee! Now go to the Game Corner, a place full of slot machines and people on them. Team Rocket made it, and you win or buy coins in order to trade it in for Pokemon and TMs in the building to the right of the Game Corner. A few people will give you free coins, and there are invisible coins scattered on the ground that you can pick up. At the top of the Game Corner, battle the Rocket member, and push the button on the poster. A staircase leading to the basement appears.(There won't be any comments for a while...) After that, you'll be going through four floors, battling Rocket members and collecting valuble items. There is a spin maze on the second basement floor (B2F). The arrows in the maze will toss you in whichever direction the arrow points. Here, you'll pick up a few items including a Moon Stone and TM12 - Taunt. On B3F, you'll find TM21 - Frustration and Blackglasses, which boosts the power of Dark Pokemon. There is another spin maze on this floor where you can pick up a Rare Candy. Head to B4F, where you'll find TM49 - Snatch. Battle the single Rocket member at the top, and he'll drop the Lift Key for the elevator. Take the elevator on B2F to B1F. Battle the Rocket member, and take the elevator again to B4F. Go all the way to the left, and pick up the Calcium. Head up to the two Rocket guards and talk to them. They'll fight you, and after you're through with them, they'll open the gates. Walk through the entrance, and you'll face Giovanni, the head of Team Rocket, in an intense match. He has a lv. 25 Onix, a lv. 24 Rhyhorn, and a lv. 29 Kangaskhan. A Grass or Water-type Pokemon would work out fine fighting this guy. However, beware of his Kangaskhan, as it can be very powerful. After beating Giovanni, he'll disappear, and leave behind a Silph Scope. This is used to detect Ghost Pokemon. After beating Giovanni in the Game Corner, head to the gym by cutting the tree. Here you will battle Erika and other trainers (many of which you can avoid, who all use Grass-type Pokemon. Erika is the trainer in the middle between the two trainers inside the enclosed area. She has a lv. 29 Victreebel, a lv. 24 Tangela, and a lv. 29 Vileplume. If you choose a Fire Pokemon as a starter, then beating her would be very easy. Even if you didn't choose a Fire-type starter, a Psycic or Ground Pokemon would come in handy, since Victreebel and Vileplume are weak against those types. Beating her earns you TM19 - Giga Drain and the Rainbow Badge! Next, head to Lavender Town's Pokemon Tower with your Silph Scope. Once you get to Lavender Town, go into the Pokemon Tower. Head up the stairs, picking up items and battling scary looking women. Right before you reach the stairs that leads to the top floor, you will be stopped by the ghost of a dead Marowak. It was a mother of a Cubone, and was killed by the evil Team Rocket. Defeat her to calm her spirits (you cannot catch her). At the top floor, you'll be fighting three Rocket members. They will leave one by one after you defeat them. At the end, you'll find an old man, known as Mr. Fuji. Talk to him, and he'll transport you to his house, where he'll give you a PokeFlute. (Argh, did I say that before? I can't remember.) Now go back to Celadon City, and head west to Route 16. Cut the tree and battle the two couples in a two-on-two match. Head through the building to get to the other side and then go into the small house. Inside, a little girl will give you HM02 - Fly. Go back and cut the tree again to get back to the other side. A fat roadblock, a lv. 30 Snorlax, is blocking the road to Saffron City. Save your game, press "A", and the PokeFlute will begin to play. Snorlax soon wakes up, probably angry at what you just did. Try to catch this Snorlax, which can be quite difficult. Even if you accidently made him faint and you didn't save the game, there's one more Snorlax in the game.
After either capturing or defeating the Snorlax, go through the Guard House for an Amulet Coin from one of Prof. Oak's aides if you've captured at least fourty Pokemon. After that, go to any Guard House that leads to Saffron City. The guard will drink your Tea, and then will let you through. The first thing you'll notice when you get to Saffron City is that it's a pretty big city. The next thing you'll notice is that everywhere you go, you'll find Team Rocket members. The first problem to take care of in this city is Team Rocket. To get Team Rocket out of the city, go to the Silph Co., the large window filled building with a member of Team Rocket next to it. Now you must go through eleven floors, fighting Team Rocket, and in the end, saving the company's president.
The first floor is empty. Go up a floor by taking the stairs at the top-right corner. Remember, your goal is to reach the top floor and save the president. However, you cannot go directly to the top floor. Also, keep in mind that you will be finding warp squares on the ground. Stepping on them will take you to different places in the building. If you want to go through all this faster, then take the elevator to the 5th floor. However, I suggest that you go up the floors one by one, as you may miss out on valuable items.
Once on the 5th floor (if you chose to go there right away), go left and down all the way until you see a warp square. Step on it, and it'll take you to the 9th floor. Step back on it, and you'll return to where you were. Proceed by going to the right, where you'll find an Itemball containing the Card Key, which is used to open any locked door in the Silph. Co. Now that you've gotten this important item, you can explore the Silph Co. by battling Team Rocket and picking up a couple of items, including TMs. There's even a Move Tutor who'll teach your Pokemon Thunder Wave on the 2nd floor. Open all the locked doors just for fun, and because you simply can, and try every warp square. If you ever need to heal your Pokemon, you can do so on the 8th floor by sleeping on the bed.
When you're done exploring, head to the 3rd floor, and open the door on the left with your Card Key. Take the warp square in the first room, and you'll be teleported to a room on the 7th floor. Here, Gary will challenge you to a battle. As usual, Gary's team has gotten stronger, and hopefully, your Pokemon can take care of him. After defeating him, talk to the Silph Co. employee in the same room and he'll give you the Pokemon Lapras. Use the other warp square to get the the 11th floor. Go into the enclosed area, and Giovanni will challenge you to a match.
Giovanni has the following Pokemon: a lv. 37 Nidorino, a lv. 37 Rhyhorn, a lv. 35 Kangaskhan, and a lv. 41 Nidoqueen. After defeating him, Team Rocket will leave the building and the city. Go to the old man sitting on the sofa, and talk to him. He's the president of Silph Co., and he'll give you the Master Ball. There is only one Master Ball in the whole game, and it catches Pokemon 100% of the time. Now that this problem is taken care of, get out of Silph Co. and head north to the Fighting Dojo. You'll be challenged by four trainers inside the Fighting Dojo. They all use Fighting Pokemon, who are weak against Psychic and Flying Pokemon. After challenging the four trainers, the leader, who has lv. 37 Hitmonlee and Hitmonchan, will challenge you to a match. After defeating him, you will be able to take a free Hitmonlee (left PokeBall) or Hitmonchan (right PokeBall). After this, it's time to go to the real gym to get your fifth badge. The real gym is right next door of the Fighting Dojo. The trainers here use Psychic Pokemon, so Dark Pokemon/attacks will be quite effective here. This gym is filled with warp squares that take you to different rooms, and in order to get through them quickly, follow these steps once you reach the first room.- Take the only warp square.
- Take the bottom-left warp square.
- Take the bottom-left warp square again.
- Take the top-right warp square.
- Take the bottom-left warp square.
- You should be in the gym leader's room.
There are two ways to reach the next city, which is Fuschia City. One way is to start from Celadon City and go through Routes 16, 17, and 18. This will take you through the Cycling Road, and is the prefered route for most people. The other way to get to Fuschia is to start at Lavender Town, and go along the coast through Routes 12, 13, 14, and 15. Going through to Cycling Road is the faster solution to getting to Fuschia City. To begin, go west from Celadon City onto Route 16. Go through the Guard House, and you'll be on the Cycling Road (you must have a bike!). On this road, you go downhills, which means that your bike will move by itself without any action from you. However, if you try to go up the hill, you will be going very slowly. There are many Bikers that you can fight on this road, which takes up Routes 16 and 17. After a long bit of biking, you'll reach Route 18.
Go through the Guard House after reaching Route 18. A trainer on the second floor will trade you his Lickitung for your Golduck. Route 18 is real short. After a few steps, you'll arrive at Fuschia City. Some people may choose to do things the harder way. The other way to get to Fuschia is slower and longer. To begin, fly to Lavender Town. Go south onto Route 12. Go to the second floor of the Guard House, where a little girl will give you TM 27 - Return. For the rest of the route, you'll be battling Fishermen. You'll also be able to fight two lovers in a two-on-two match.
Around halfway through Route 12, you'll encounter another sleeping Snorlax who's blocking the road. You must use your PokeFlute to wake him up and catch it or defeat it. There's a house on this route with a Fisherman inside who'll give you the Super Rod, which is the best Rod in the whole game. After that, you can cut a tree, fight the trainer that's enclosed, and pick up an Iron. After going on Route 12 for a long time, you'll soon begin traveling on Route 13.Route 13 is mainly a maze filled with trainers. This maze is quite easy to get through, and most of the trainers can be avoided. Route 13 ends when the maze ends, and marks the beginning of Route 14. Route 14 is simply going south. You'll have another opportunity to have a two-on-two match with the Twins. After a short Route 14, you'll get to Route 15. You can find TM18 - Rain Dance by cutting the tree and going all the way to the end. Here, you'll be able to fight in another two-on-two match with Fighting Pokemon. One of Prof. Oak's aides is in the Guard House that marks the end of Route 15. If you have captured at least fifty Pokemon, he'll give you an Experience Share. This is a very useful item in that it shares battle experience with all the Pokemon on your team. Finally, you'll arrive at Fuschia City. Fucshia City is the home of the Safari Zone, an area filled with capturable wild Pokemon. Right now, you can visit the Move Deleter's house, which is located right next to the Pokemon Center, to delete an unwanted move. Visit the house next to the house with the mailbox for a Good Rod. We'll visit the Safari Zone later. For now, we need to fight the gym leader of this city's gym. It's time for you to get your sixth badge in the Fuschia Gym. However, getting to the gym leader may not be as easy as you think. The gym is filled with invisible walls. You have to walk around and figure out which areas you can go through and which ones you can't. Start on the right side, with the trainers serving as markers. Although they are invisible, a close observer would see that white dots mark the outlines of the walls.
Soon, after trial and error or by getting around the dots, you'll reach Koga, the gym leader. He has two lv. 37 Koffing, a lv. 39 Muk, and a lv. 43 Weezing. Psychic Pokemon will work best against Koga's Pokemon. After beating four tough Pokemon, Koga will award you with TM06 - Toxic and the Soul Badge. In order to leave, you must go through the walls again.
Now that you've defeated Koga, you're only two more badges away from eight! For now, put the thought of getting the last two badges away, because we need to go into the Safari Zone for some item searching. Go into the Safari Zone, which can be found in the northern part of the city. It'll cost $500 to get into the Safari Zone. They'll give you thirty Safari Balls, which is used exclusively to capture Safari Zone Pokemon. Your mission now is to find the Surfer's House, which is deep inside the Safari Zone, and get HM03 - Surf. Your other mission is to find Gold Teeth. You have 600 steps before your time runs out; good luck!
Important items contained in Itemballs in the Safari Zone include the Gold Teeth, Leaf Stone, Protein, TM11 - Sunny Day, TM47 - Steel Wing, and TM32 - Double Team. After finding the two "mission" items listed above, head to the Warden's house (the house with a mailbox next to it) in the eastern part of the city. Give the Warden the Gold Teeth, and he'll give you HM04 - Strength. Teach the new HM to a Pokemon, and move the boulder that's blocking the Itemball. Then pick up the Rare Candy. Your trip to Fuschia City is over. Now that you have Surf, you'll be able to catch two legendary Pokemon: Articuno and Zapdos. To catch Articuno, you must go south from Fuschia City, and go west through the sea routes of 19 and 20. There are many swimmers waiting to battle you. You'll get past them pretty quickly. Soon, you'll arrive at one of the two Seafoam Islands.Once you enter, go right and push the boulder into the hole using Strength. Go to the other side (past the first ladder you see), and push the other boulder into the other hole. Go back to the original hole, and fall into it. Keep on pushing the boulder and following it (falling into the holes with the boulder) until you reach the water. Once you do, the current will take you to another level. Go up onto the land, left, and down all the way for an Ultra Ball. Take the only ladder to another level. Follow the path south and you'll find a puzzle involving a few holes and plenty of boulders.
Push the only boulder that you can push left all the way left so that it doesn't block your way. Next, push the single boulder into the hole. Now you'll have to work on the last two boulders. Push the one on the right all the way up, and find a way to push the other boulder into the other hole. Now jump into that hole. You'll reach another level. Surf up and you'll meet Articuno.After the encounter with Articuno, go onto land and take the ladder. Go down afterwards and take another ladder. Go right and pick up the Pearl. Go right to take another ladder that'll lead you to a Water Stone. Come back, go up the steps, and take the ladder. Push the boulder that you've pushed in the beginning into holes and follow it. Do this until you reach water. The current will be blocked, and you'll be able to go onto land. Follow the path, and soon, you're out of the Seafoam Islands! Before you go to catch Zapdos, make sure that you have plenty of Ultra Balls, Great Balls, and preferably, a Pokemon that can put another Pokemon to sleep or paralysis. Fly to Route 10, go north from the Pokemon Center, and begin surfing in the water. Surf all the way south until you reach land. You have reached the Power Plant. Deep inside here, you'll find Zapdos.
The Power Plant is filled with Electric Pokemon and many Itemballs. Some of these Itemballs are actually Electrode trying to trick you into picking them up. The most they'll do is some damage. Don't be afraid of running into an Electrode; try to pick up every Itemball to make sure that you don't miss any items, especially TM25 - Thunder and the Thunderstone. The Power Plant is pretty easy to navigate. Soon, you'll find a lv. 50 Zapdos. Here's a tip that a trainer must always follow: save the game before fighting it, and restart the game to catch it again if you make it faint. Fly to Pallet Town, and go south onto Route 21. Surf all the way south. Soon, you'll reach Cinnabar Island. Cinnabar Island is a small island that's packed with buildings and full of things to do. On this island, you'll find the typical Pokemon Center and PokeMart, a gym, the Cinnabar Mansion, a research center, and two people standing outside. The first thing we'll do is go into the Pokemon Lab. You received either a Helix Fossil or Dome Fossil earlier in the game in Mt. Moon, and an Old Amber too. Now you can bring these fossils to life in the Pokemon Lab, an oval-like building. Find it, and go inside. The first room has two people who'll trade Pokemon with you. The old man will trade you his Electrode for your Raichu, (what a bad deal!) and the lady will trade you her Tangela for your Venonat. (Better.) There's a Move Tutor in the second room who will teach Metronome. Talk to the scientist in the third room, and he'll resurrect your fossils. Wait for a while and come back. He'll have an ancient Pokemon ready for you after a bit of walking. You'll notice that the Cinnabar Gym is locked. The key that'll unlock the door can be found in the Pokemon Mansion.In the basement, go into the room to your left, and switch the Mewtwo statue so that's its eyes aren't glowing. Head up into another room to pick up TM14 - Blizzard. Flip on the Mewtwo statue in the other room to pick up two items. One of them is the Gym Key, which unlocks the Cinnabar Gym; the other is TM22 - Solar Beam. Now that you've gotten what you came for, it's time to leave this mansion and go to the gym. Before you fight the Gym Leader of Cinnabar Gym, you must go past six trainers. You will either answer a question right to get pass them without a battle, or you'll have to battle them. To answer a question and get to the next room, you must go to the Quiz Machine, and answer "Yes" or "No" to the question asked. Here are the answers to all six quizes: Yes, No, No, No, Yes, No The gym leader's an old, bald man named Blaine. He uses powerful Fire Pokemon. Use Water Pokemon to put Blaine's Pokemon out. He has the following Pokemon: a lv. 42 Growlithe, a lv. 40 Ponyta, a lv. 42 Rapidash, and a lv. 47 Arcanine. After defeating Blaine, he'll give you TM38 - Fire Blast and the Volcano Badge. Right when you exit the gym, Bill will come to you and ask you for help. If you want to help him, he'll take you aboard a ferry and bring you to the first Sevii Island. There are seven Sevii Islands in total. The Sevii Islands contain legendary Pokemon and Pokemon from the Johto region. A victory at the Cinnabar Gym gives you access to the first three islands. The next four islands can be accessible only after defeating the Elite 4. Right after arriving on the first Sevii Island, also known as Knot Island, Bill will take you to the Pokemon Center and lead you to a huge machine with his friend, Celio, standing next to it. Bill tells you that the machine is broken, and he needs you to find the parts to fix the machine. He gives you a Meteorite from Mt. Moon, a Tri-Pass for ferries to get the One, Two, and Three Island, and a new addition to your Town Map that contains a map of the Sevii Islands. Heal your Pokemon and get out of the Pokemon Center. Surf in the northeast direction. You'll reach land almost immediately. In this area, known as Kindle Road, you'll be battling trainers and catching Pokemon. There are Itemballs behind breakable rocks, which can be broken using Rock Smash. Head north and enter the Ember Spa. Inside is a hot spring where you can heal your Pokemon by dipping yourself in the water. Talk to the old man next to the waterfall to get HM06 - Rock Smash. Head north from the cave with the hot spring, and you'll reach a beach. Surf north, and you'll reach Mt. Ember. Here, you'll be able to catch Moltres. After going inside the mountain, head left and push the boulders away using Strength. Follow the path and smash the rocks. Next, you'll see three sets of stairs. Take the the left or center stairs and go left. Fight the trainer, and go into the entrance right up ahead.
There's only one way to go in here, so it's pretty easy to navigate. Once you get out, take the stairs up. Go to the left side for a hidden Fire Stone in a boulder below the stairs. Another Fire Stone can be found by solving the easy boulder puzzle on the right side. After getting both Fire Stones, head up the stairs again. Now you'll face another puzzle, this one a little bit more difficult than the last one, but still isn't difficult at all. After getting through the puzzle, a lv. 50 Moltres awaits you. Fly back to the island's Pokemon Center from Mt. Ember, and go south. You'll reach the dock where you first arrived at the island. Take the Ferry to Two Island.Two Island, or Boon Island, is simply a small village. Once you get onto the island, go east into a nice looking tan colored house with a blue roof, the Game Corner. This Game Corner isn't like the Game Corner in Celadon City with slot machines; this place let's you play mini games called Pokemon Jump and Dodrio Berry-Picking with a friend. A little girl's father will ask you to save his daughter, Lostelle. This rescuing is all done on Three Island. For the guide on Three Island, click on "Next" below.For now, you can go all the way north to the Move Tutor's house, located in a small region called Cape Brink. This Move Tutor teaches your starter Pokemon moves for free. She teaches one of three moves, depending on your starter Pokemon: Frenzy Plant (Grass), Blast Burn (Fire), or Hydro Cannon (Water). These moves all do 150 damage, which is a lot. Be sure to have your starter in the first slot before talking to the Move Tutor. Now you'll need to go to Three Island to save the man's daughter. Once you arrive on Three Island, also known as Kin Island, you'll see a woman surrounded by Bikers of the Kanto Rider Federation. Go north and you'll see even more Bikers. You'll have to fight four Bikers consecutively. After defeating the fourth, the Bikers will leave. Talk to the nearest person for a Full Restore. Go all the way to the north and cut the tree on your right. Go down for a Zinc. Go west into the grassy areas, known as the Bond Bridge. Follow the path: get past the grassy area, bridge, and the beach, and go into the forest. The gym leader is Giovanni. As you know already, he's the leader of Team Rocket. He uses a lv. 45 and lv. 50 Rhyhorn, a lv. 42 Dugtrio, a lv. 44 Nidoqueen, a lv. 45 Nidoking. Water-type attacks can take care of his Pokemon pretty easily. After defeating Giovanni, he'll give you TM26 - Earthquake, and your final badge: the Earth Badge. Afterwards, he will leave, and so will you.
Now that you have all eight of your badges, it's time to go to the Pokemon League, where you'll face the Elite Four, the toughest trainers yet. Now you must heal your Pokemon and head west from Viridian City onto Route 22.
Gary will come to battle you in the same spot where you battled him on this route last time. The last time you fought him here, his Pokemon were weak. Now, however, you should really watch out. All of his Pokemon are near or above lv. 50, so your Pokemon should be trained to about the same level. After beating Gary, follow the road and head west into the Pokemon League's Front Gate, which takes you to Route 23. You'll go through eight guards, each checking for one of the eight badges. After getting past all eight guards, you'll reach the cave known as Victory Road. Once you get in, you'll see a boulder. Use Strength to push that boulder to the ground switch on the right. Now head up the stairs, and go on until you see two other stairs between a trainer: one on the left and one on the right. Take the stairs on the right for a Rare Candy and TM02 - Dragon Claw. After getting the items, take the stairs on the left, and go up the ladder.
Go down and push the boulder onto the switch. Go up the stairs, and head east. If you choose to go down the stairs, you'll find TM37 - Sandstorm. No matter what you do, you'll need to go up the ladder located at the very end of this level. Before you take the ladder, be sure to pick up TM07 - Hail above the ladder.
Once you reach the next level, push the boulder you see up two times, and all the way west onto the switch. The Itemball you see contains TM50 - Overheat. Now head back to where you came from, and go up the stairs. Go all the way west, down the stairs, and all the way east. Push the boulder down the hole, and jump in with it. Push the boulder to the switch on the left. Head up the stairs, and then the ladder. Then you'll encounter a two-on-two Pokemon battle. Take the other ladder, go right, and you'll find a Move Tutor who teaches Double Team. Finally, you can exit Victory Road.
After all that, you'll reach the Indigo Plateau, where you'll fight in the Pokemon League. You'll definitely want to heal your Pokemon once you get into the Pokemon League building. Go into the PC, and draw out any Pokemon you want to use during battle. Stock up on some essential items, such as Full Restore and Revive. After that, save the game in case you lose, and talk to the official standing by the entrance. Go inside, and get ready to battle the Elite Four!The first member of the Elite Four is Lorelei. She uses Ice and Water Pokemon. Her Pokemon are listed below:
- lv. 52 Dewgong
- lv. 51 Cloyster
- lv. 52 Slowbro
- lv. 54 Jynx
- lv. 54 Lapras
The second member of the Elite Four is Bruno. He uses Fighting and Rock Pokemon. His Pokemon are listed below:
- lv. 51 Onix
- lv. 53 Hitmonchan
- lv. 53 Hitmonlee
- lv. 54 Onix
- lv. 56 Machamp
The third member of the Elite Four is Agatha. She uses Ghost and Poison Pokemon. Her Pokemon are listed below:
- lv. 54 Gengar
- lv. 54 Golbat
- lv. 53 Haunter
- lv. 56 Arbok
- lv. 58 Gengar
The fourth member of the Elite Four is Lance, also known as the Dragon Champion. He uses Dragon Pokemon. His Pokemon are listed below:
- lv. 56 Gyarados
- lv. 54 Dragonair
- lv. 54 Dragonair
- lv. 58 Aerodactyl
- lv. 60 Dragonite
After battling the Elite Four, you might think it's over. But it's not over the yet; it's time to face the real champion: Gary!
Gary's the champion. He has a full team of strong Pokemon. Defeating him requires a lot more strategy than the Elite Four. Below are his Pokemon.
- lv. 61 Pidgeot
- lv. 59 Alakazam
- lv. 61 Rhydon
- If you chose Bulbasaur, then he has a lv. 61 Exeggutor, lv. 63 Gyarados, and a lv. 65 Charizard.
- If you chose Charmander, then he has a lv. 63 Exeggutor, lv. 61 Arcanine, and a lv. 65 Blastoise.
- If you chose Squirtle, then he has a lv. 63 Arcanine, lv. 61 Gyarados, and a lv. 65 Venusaur.
The Hall of Fame
After defeating Gary, Prof. Oak will come to talk to you. After a short conversation, he'll lead you into the back room, and enter your Pokemon and yourself into the Hall of Fame. You are now a Pokemon Master!What More Is There To Do?
The game will restart itself, and you'll be back in Pallet Town. If you've captured more than sixty Pokemon now, Prof. Oak will upgrade your PokeDex, along with Gary's. After the upgrade, you'll find a "National" section, which can display up to 386 Pokemon. With this PokeDex, you can explore the rest of the Sevii Islands and catch Johto Pokemon (Pokemon that appeared in Gold/Silver/Crystal versions).AND THIS is where I'll be leaving you, my dears. Toodle-oo!
Annie OUT.
Whoa, that is long!
ReplyDeleteYup.
ReplyDelete:)
ReplyDelete